A STEP-BY-STEP GUIDE TO MAKING YOUR OWN (BASIC) WEB PORTFOLIO
STEP 1 | Getting your content ready
Collect your media content
Collect all of your documentations for all the projects you would like to showcase on your web porfolio. If the photos and videos of your projects are spread all over everywhere, you need to dig them up and organize them, first locally on your computer, before we start with anything else. If you have pre-existing descriptions about your works, collect those in a single place as well.
Organizing your media content
Images:
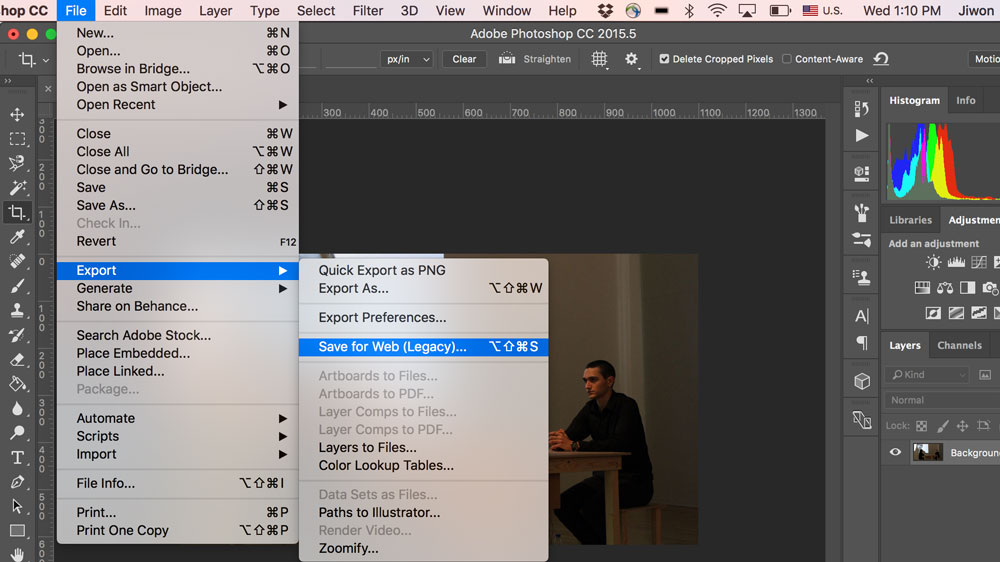
Very high resolution photos on the web may take too much time to load. There needs to be a compromise between the quality and size of your photos. You can resize your images for your website using Photoshop by selecting the "save for web" under export.
It may be also a good idea to keep your images sizes same for all the images that you are going to use for your website. For example, if you are planning on creating a grid of images, making your images to be same sizes will help with keeping a uniform and finished look. For instance, I like sizing my images to 1000px width 562px height.
Videos:
Video files will inevitably be a lot bigger than your image files, and uploading and hosting video documentations of your projects on your own server will take a lot of space as well as be very slow for the users to watch. This is why, it is recommended that you upload all of your video files to any of the video streaming websites such as Youtube and Vimeo. If you are concerned about not making your videos searchable on these platforms and use it only as a method of storing your videos, there are also ways to do that. On Youtube, you can simply make your videos "unlinked" instead of "public".
If you have your videos all loaded up to, for example, Youtube, we can use their sharing by iframe method to display them on your own website.
STEP 2 | Getting started with MDL
If your are done with preping your materials, or you have some to get started with web design, now is the time to learn about MDL.
Take a quick look around MDL's Getting Started guide.
The important parts to look at are sections "Include the master CSS & Javascript" and "General rules and principles"
To be able to use MDL's templates, we need to import in the stylesheets and javascript. There are different ways of including these MDL's files to your website, but for this workshop, we are going to use the method of using the hosted url of the files as arguments for href of link tags. These means that we don't actually need these stylesheets and javascript files to use MDL in our local computer / on the server.
In between the head tags, put:
        <link rel="stylesheet" href="https://fonts.googleapis.com/icon?family=Material+Icons">
        <link rel="stylesheet" href="https://code.getmdl.io/1.3.0/material.indigo-pink.min.css">
        <script defer src="https://code.getmdl.io/1.3.0/material.min.js"></script>
Additionally, inside the same <head> tag, put the viewport metadata so that it will size correctly on mobile devices:
<meta name="viewport" content="width=device-width, initial-scale=1.0">
And with this, we are now ready to start using MDL's templates and style components.
MDL provides a set of templates, which are basically complete websites with dummy contents. This webpage shows the few templates that they have which you can download and use by replacing the content. However, at this workshop, we are going to be using only different compontents of the styles provided by MDL. This means that I'm going to be using a navigation bar template from MDL, but I will be styling my own main body div. This way, we don't have to completely adhere to all the styles and structures that come with the downloadable templates that they have.
Let's look at the components page. It has a lot of different kinds of components that you can simply insert into your website in different pages.
Choosing a basic layout
We are going to start by choosing a basic layout from this page. This page will show you what the layout looks like and the code you can copy and paste for you to use on your website. Pick one layout you like, and place it between your body tags. I've picked the fixed header layout, so my html code will look like this:
        <body>
          <div class="mdl-layout mdl-js-layout mdl-layout--fixed-header">
          <header class="mdl-layout__header">
          <div class="mdl-layout__header-row">

          <span class="mdl-layout-title">Title</span>

          <div class="mdl-layout-spacer"></div>

          <nav class="mdl-navigation mdl-layout--large-screen-only">
            <a class="mdl-navigation__link" href="">Link
            <a class="mdl-navigation__link" href="">Link
            <a class="mdl-navigation__link" href="">Link
            <a class="mdl-navigation__link" href="">Link
          </nav>
          </div>
          </header>
          <div class="mdl-layout__drawer">
          <span class="mdl-layout-title">Title</span>
          <nav class="mdl-navigation">
            <a class="mdl-navigation__link" href="">Link
            <a class="mdl-navigation__link" href="">Link
            <a class="mdl-navigation__link" href="">Link
            <a class="mdl-navigation__link" href="">Link
          </nav>
          <div>
          <main class="mdl-layout__content">
            <div class="page-content"></div>
          </main>
          </div>
        </body>
Like this, you can insert in differet compontent that MDL has within your website. The way this works is by referencing the set classes that MDL has defined in their stylesheet.
STEP 3 | Customizing the template
Inspector is your friend
When using a template, such as MDL and Bootstrap, to create a website, if you want to fine-tune it to make it exactly the way you want it to, you might have to override the styles that come with the template's stylesheets. To do this you can use the inspector tool to find the relevant css tags that you need to apply the overriding styles onto.
You should create your own css stylesheet, where you are going to save all of your custom styles onto.
If you were able to find the correct class of which some of its styles needs to be overrided, in your own css stylesheet you can add things like
        .mdl-layout__header{
          background-color: rgba(0,0,0,0.85) !important;
        }
which will override the background-color style for the .mdl-layout__header class already set in MDL's stylesheet. Notice that there is ""!important" written next to the css argument. This means that this particular instance of style declaration will be prioritized over any other found in different locations, in this case the MDL stylesheet.
Some tips about CSS
Now, we are going to go over some tips about styling your website.
Units in CSS:
There are actually a lot more units of measurement than just pixels and percentages you can use in css. This w3schools page shows all the existing units of measurement in css. Out of the many units of measurement, I want to emphasize just a couple: vw, vh, em, rem.
vw and vh stands for "viewport width" and "viewport height". 1 vw is 1% of the viewport width, which means the current width of the window. This means that if the width of your window changes, the absolute size of 1 vw will change accordingly. Thus, 100 vw will signify the width of your browser window and 100 vh will be the height of your browser window. You can also make something 120 vw, which would be the 120% of your viewport width.
em and rem are units based on the size of the font. em means the width of your letter "m". The difference between em and rem is that 1 em means the width of letter "m" according to the font size you set for that particular div (or the inherited size of the font size of the div), and 1 rem means the width according to the font size of the root, meaning the font-size set for the whole html tage / page. For example, if you are sizing the width of your h1 tag using em, and if your h1 tag has font-size of 32px, 1 em = 32 px. However if you use 1 rem, and the font-size you've set for the whole html tag is 12 px, then 1 rem = 12 px. If this is hard to grasp, play around with it by setting different values on inspector.
Centering your div / image:
These three lines will help you center your divs / images or just about any non-text html elements.
        position: relative;
        display: block;
        margin: auto;
Centering text elements, such as header tags and paragraph tags, are done by:
text-align: center;
Centering iframes:
If you did follow the recommendation to upload all your video files to Youtube / Vimeo, as I said before, we are going to be inserting in these videos as iframes. However, making iframes resizable is a tricky business.
The first step of doing this is to create a div nesting the iframe tag and give it a class, like this:
        <div class="video-wrap">
          <iframe width="1000" height="526" src="https://www.youtube.com/embed/8ox2s-dLYjk" frameborder="0" allowfullscreen></iframe>
        </div>
Then we are going to put these styles to the div itself as well as to the iframe inside of that div. Some of these styles may not be intuitive, like the argument for padding-bottom, but this is simply the percentage of the ratio of the resolution of your video.
        .video-wrap {
        	position: relative;
        	/*padding-bottom: 56.25%; !* 16:9 *!*/
        	padding-bottom: 53.25%;
        	padding-top: 25px;
        	height: 0;
        }
        .video-wrap iframe {
        	position: absolute;
        	top: 0;
        	left: 0;
        	width: 100%;
        	height: 100%;
        }
Creating a download link:
You can make something downloadable from your website.
For example, if you want to have people be able to download your CV, you should save it within your folder that contains all of your files for your website and pass in the path to the file for the argument of href, and "download" within the link tag. The 'target="_blank"' forces whatever you have linked to your a tag to open in a seperate tab.
<a class="p-link" href="data/cv.pdf" download target="_blank">CV</a>
STEP 4 | Uploading your website to Github Pages
Installing Git
Before we start with Github, we need to install Git on our computers. Go to this website to download and install Git.
If you don't know what Git is, go to the Git Basics page and read about it, but to summarize, it is a version control software.
Setting up a Github account (if you don't have one already)
If you have never heard of Github, it is a web-based Git or version control repository and Internet hosting service. If you have never used Github before, please go to their website and create an account.
Setting up your Github Pages
Github allows you to host a single website per username, and this is called Github Pages. Please go to their introduction website and read up about what they are. If you create a repository, which is like a folder on Github, and call it your_github_username.github.io, it will let you host these files in the form of a website. So for example, my Github account username is js6450, so if I create a repository called js6450.github.io and put the files for my website in this repository, I can have it hosted under URL of js6450.github.io
To create a new repository, click on "new repository" button on your account page, or click on this link.
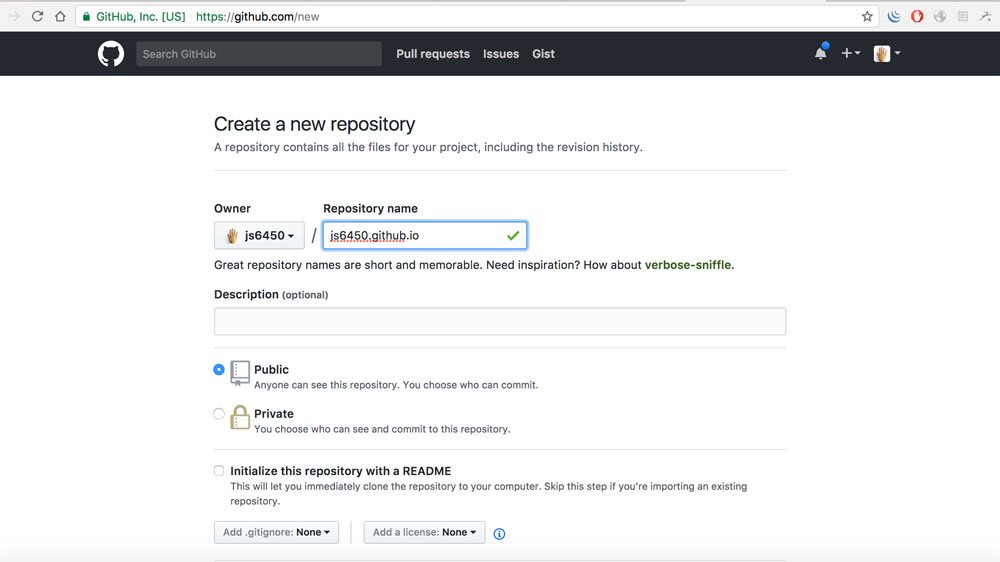
For your repository name, enter your_github_username.github.io, like in the screenshot above, and click on the "create repository" button at the bottom.
Uploading your files
Assuming you have all or some files for your website ready, we can how upload them to the Github repository to actually see it hosted online.
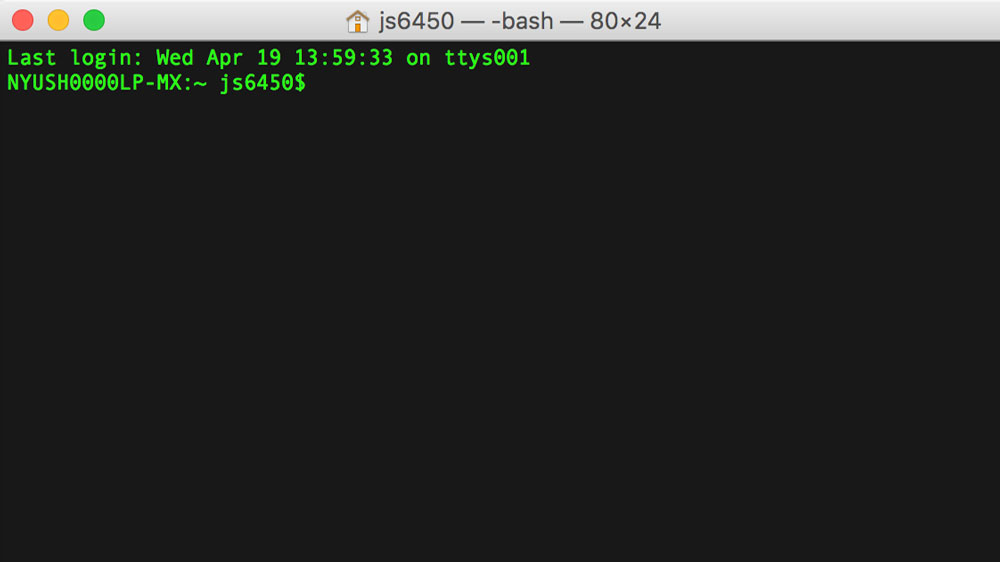
This might be a little tricky, because here we are going to use terminal. Open up your "terminal" application and it will look something like this.
First of all, we need to locate the folder that contains the files that we created for our website. To do this, open up finder, and go to the folder and after typing in "cd " (with the space after "cd"), drag your folder on to the terminal screen. When you do this, you will see something like this:
NYUSH0000LP-MX:~ js6450$ cd /Users/js6450/Desktop/web-portfolio-workshop
presse the return / enter key, and now you are in that folder on terminal.
Text type:
git init
This will initialize your git repository. When you type and press enter / return, you will see the below:
Initialized empty Git repository in /Users/js6450/Desktop/web-portfolio-workshop/.git/
Next, we have to link this local git repository to the one that we have created on Github so we can upload our files to it. When we created a new repository on Github's website, you should have seen something like this image below:
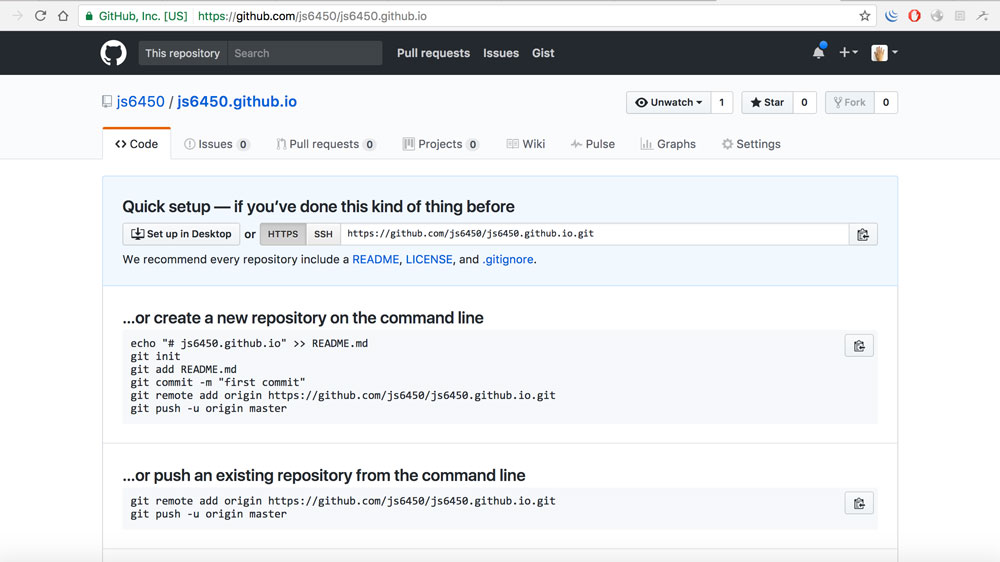
The important information on this page is the url available for copy in the section that says "Quick setup - if you've done this kind of thing before". The url in the form of https://github.com/username/username.github.io.git is the information we need to link our local folder to the one on Github. Using this url, we are going to add it as our "remote origin", meaning that when we tell it to upload files, this is where it will be uploaded to. Type in:
git remote add origin https://github.com/js6450/js6450.github.io.git
while replacying the url at the end with your own. To verify that this remote origin is set correctly, type:
git remote -v
and you should see something like below:
        origin	https://github.com/js6450/js6450.github.io.git (fetch)
        origin	https://github.com/js6450/js6450.github.io.git (push)
Now we need to actually upload the files we have on our local folders to github. Type:
git add .
Next type below, but you can change what you put inside the quotation marks, and this should be a message that you are saving along with this iteration of upload of your files, so it should reflect what files you are uploading at the given time.
git commit -m "first draft of my portfolio"
Then the final step:
git push origin master
and with this, all of the files in this folder should have been uploaded to the Github repository, and should be viewable if you go to http://your-username.github.io